Deploy Your Flask APP on Coolify
hi! i hope this simple tutorial helps you, i used a base flask project test-app
Set up your database:
To get started, create a new project database and configure your port to be publicly accessible. This will ensure that your database can be reached by your Flask API.
Create a Database and Set up Permissions
Next, create a new user and database, and grant the necessary permissions. Here are the commands to follow:
The user mariadb doesn’t have permission to create and manipulate databse.
|
|
login in db with ths command:
mariadb -u mariadb -D linksdb -p
execute these commands:
|
|
Set up your project
Now, let’s set up your project environment. Follow these steps:
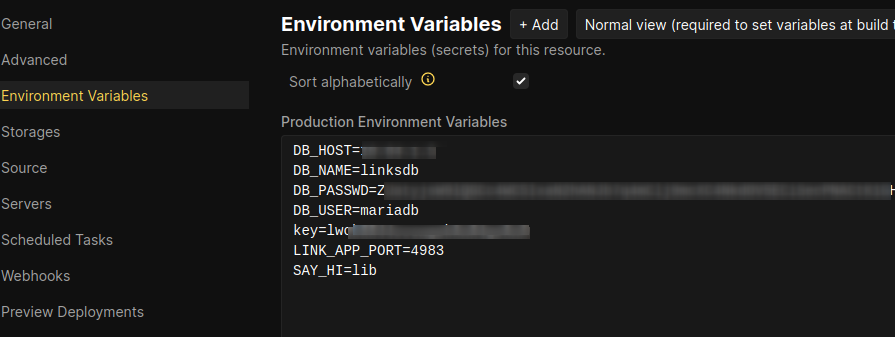
- Configure your Python environment variables.
-
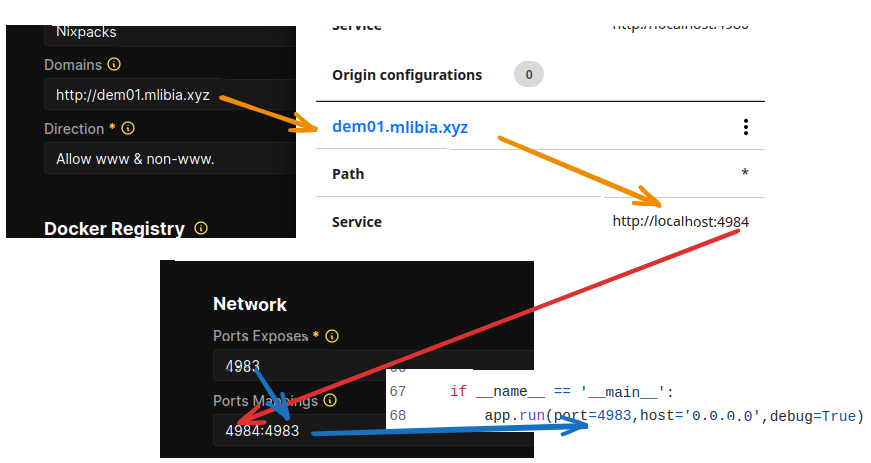
Set up your domain name using Cloudlflare tunnels. This will allow you to access your API using a custom domain name.
-
Remember to configure the expose and port mapping. In the port mapping , the left side should corresponf to the port of the cloud tunnel.
Offtopic
Lastly, if you have a dog, please remember to take good care of them.🐶